- Core Application Scenarios of Multi-Unit Abutments
Multi-unit abutments are widely used in multiple-implant restorations and full-arch implant restorations, thanks to their advantages of "adjustable angulation + compatibility with diverse restoration needs". Their application in all-on-4 and all-on-6 scenarios is particularly critical.
- Routine Implant Restoration Scenarios
-
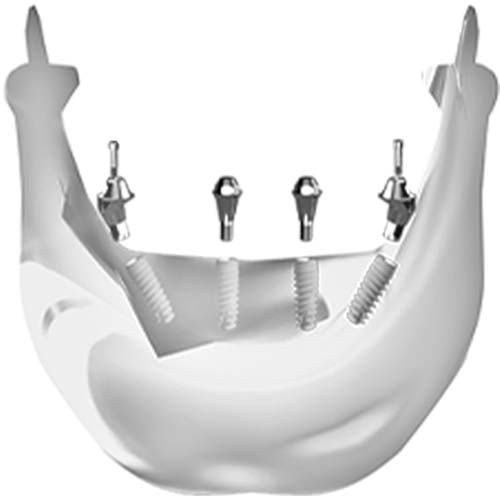
All-on-4 Full-Arch Implant Restoration
Supported by 4 implants (2 straight implants in the anterior region + 2 tilted implants in the posterior region) for full-arch bridges, multi-unit abutments serve two core purposes:
-
-
Correct tilted posterior implants (angulation: 15-30°) to ensure the common path of insertion for full-arch bridges.
-
Flexibly adjust gingival height to match varying gingival thicknesses, preventing excessive gaps or abutment exposure.
-
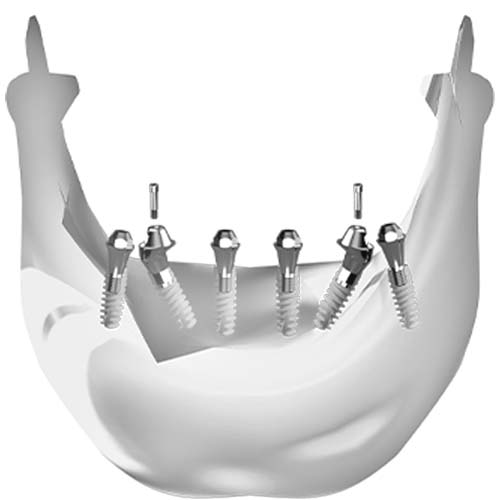
All-on-6 Full-Arch Implant Restoration
Enhancing stability with 6 implants (evenly distributed in anterior and posterior regions, some tilted at 20-40°), multi-unit abutment selection focuses on:
-
-
Correct tilted implants (angulation: 20-40°) to balance implant loading direction.
-
Match platform diameter to alveolar ridge width in anterior/posterior regions: Smaller diameters for anterior teeth to reduce gingival compression, larger diameters for posterior teeth to improve restoration retention.
- Three Core Dimensions for Multi-Unit Abutment Selection
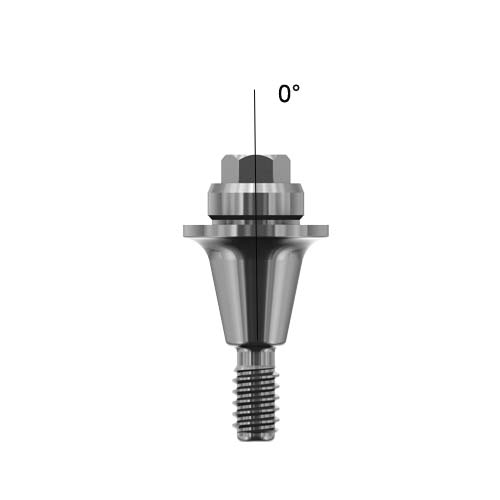
- 1. Gingival Height: Dual Guarantee of Esthetics and Hygiene
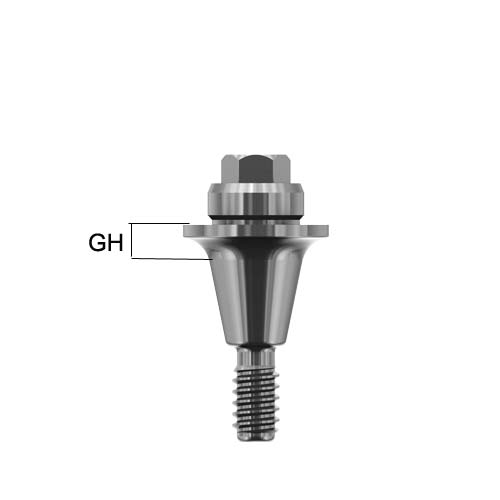
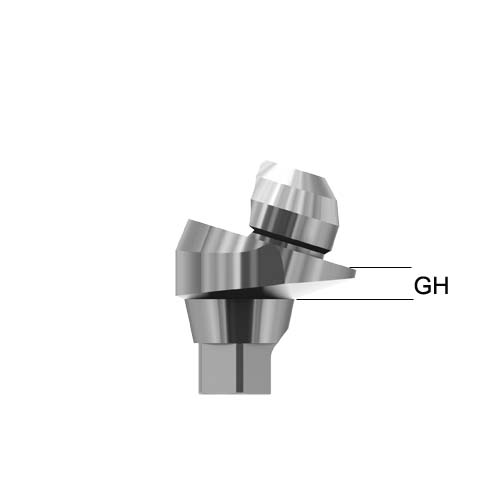
Core Principle: The actual gingival height of the selected abutment should be slightly shorter than the gingival thickness to avoid post-restoration abutment exposure and reduce food impaction risks.
Practical Steps:
-
- Preoperatively measure the gingival thickness at the implant site with a periodontal probe (accurate to 0.5mm).
- Selection Standard: Abutment gingival height = Gingival thickness - 0.5~1mm (e.g., 2.5mm or 3.0mm gingival height for 3.0mm gingival thickness; 1.5mm gingival height is preferred for 2.0mm gingival thickness).
- Special Scenario: For all-on-4/6 restorations with thin gingiva (<2mm) at some sites, choose low-gingival multi-unit abutments (1.0-1.5mm) combined with customized resin veneers to hide abutment margins.
- Abutment Angulation: "Corrector" for Implant Angulation
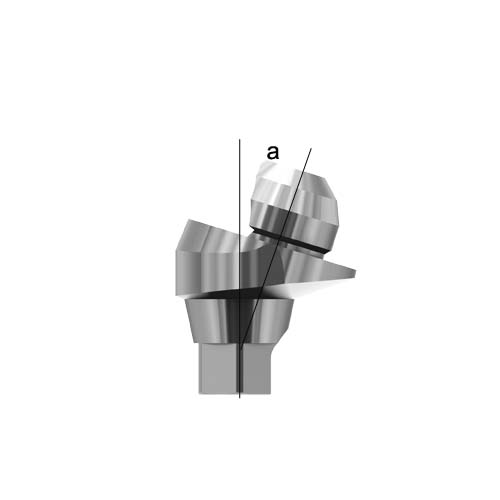
Selection Standard: Strictly match the actual implant angulation to avoid excessive stress concentration on the abutment:
|
Implant Angulation
|
Recommended Abutment Type
|
Key Considerations
|
|
0-15°
|
Straight abutment or 15° angular abutment
|
Prioritize straight abutments in the anterior esthetic zone for labial esthetics; 15° abutments optional for posterior regions based on occlusal space.
|
|
10-25°
|
15° or 17° angular abutment
|
17° abutments are preferred for 15-20° angulation for higher correction accuracy; reserve sufficient occlusal space (≥2mm).
|
|
20-40°
|
30° or 35° angular abutment
|
Commonly used for tilted posterior implants in all-on-4/6; avoid abutments over 40° to prevent fracture.
|
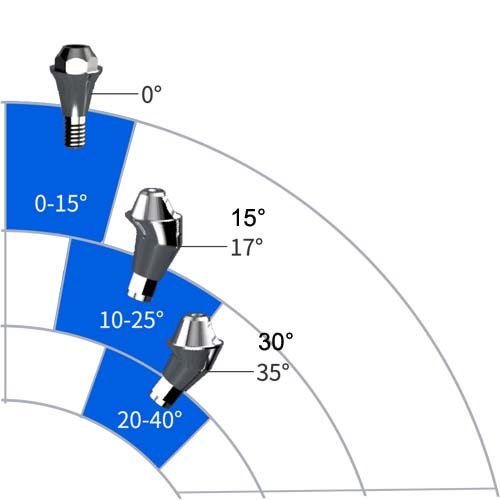
Critical Reminder: The "offset direction" of the angular abutment must align with the implant tilt direction. For all-on-4/6 restorations, unify the common path of insertion for all multi-unit abutments to ensure seamless adaptation of the full-arch bridge.
- Superior Platform Diameter: Matching Alveolar Ridge and Tooth Position Needs
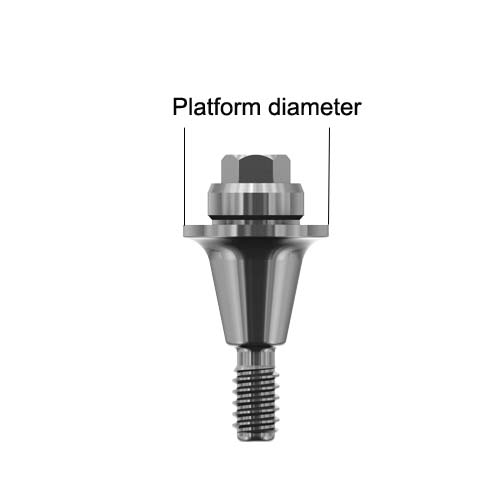
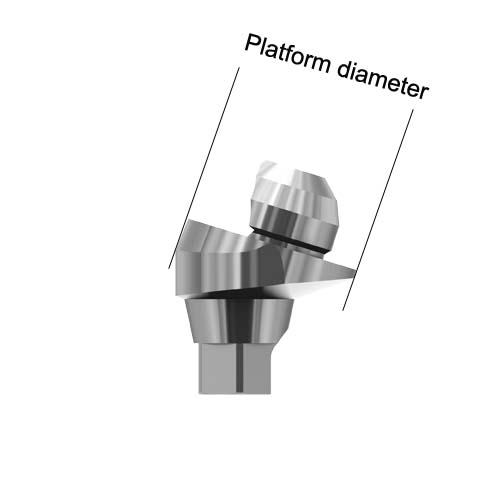 Platform diameter should match alveolar ridge width and tooth function. Diameters vary by brand (e.g., 3.5mm, 4.5mm, 5.5mm) and must be selected based on implant model:
-
- Anterior Region (Central Incisors, Lateral Incisors):
-
-
- Application Scenario:Narrow alveolar ridge (width <6mm) with high esthetic demands.
- Recommended Diameter:5-4.5mm small-diameter multi-unit abutments to avoid labial gingival recession from compression.
-
- Posterior Region (Molars, Premolars):
-
-
-
-
-
Application Scenario: Wide alveolar ridge (width ≥6mm) with heavy occlusal forces.
-
Recommended Diameter:0-6.0mm large-diameter multi-unit abutments to increase contact area with the superstructure and enhance retention stability.
All-on-4/6 Exclusive Recommendation: Uniformly use small-diameter multi-unit abutments in the anterior region; flexibly match diameters in the posterior region based on alveolar ridge width to ensure consistent adaptation between the full-arch bridge and abutments.
- Selection Summary: 3 Key Clinical Decision-Making Logics
- Evaluate Implant Status First: Clarify implant angulation and insertion depth—this is the foundation for determining multi-unit abutment angulation and gingival height.
- Assess Anatomical Conditions:Alveolar ridge width determines platform diameter, while gingival thickness determines gingival height—both are indispensable.
- Align with Restoration Type: Single-tooth restorations prioritize esthetics and precise seating; all-on-4/6 restorations prioritize common path of insertion and overall stability—angular abutment selection must balance global needs.


There is no "one-size-fits-all" solution for multi-unit abutment selection. However, by adhering to the core logic of "implant angulation - angulation matching, gingival thickness - gingival height adaptation, alveolar ridge width - diameter correspondence" and integrating the specific needs of scenarios like all-on-4/6, you can achieve dual optimization of functionality and esthetics.


